Learn Torchserve with examples + Introducing the management dashboard
torchserve
streamlit
dashboard
Published
October 15, 2020
In my previous post I shared how to serve a 🤗 transformer model with torchserve to have your own self-hosted token-classification inference widget.
This time I will go into more detail on torchserve. And share the torchserve management dashboard for making life easier 🎉
What is Torchserve?
Torchserve is an official solution from the pytorch team for making model deployment easier.
💡 Some feature highlights and why you should care;
Automatic batching of incoming requests!⭐no more fumbling with request poolers & threads;
Let’s say your server got 210 requests at once; if configured to use a batch size of 16, those requests get batched like (16*13)+2. That means 13 batches of requests get distributed between however many workers you have and the remaining 2 request wait for more incoming requests, that is until max_batch_delay then they also get processed and returned.(Each request = 1 example)
Flexible scalability
You can easily spawn multiple workers and change the number of workers.
During busy hours just increase the number of workers to spawn more workers!
🔥 It also respawns a worker automatically if it dies for whatever reason.
Model versioning
Easy A/B testing.
Inbuilt handlers for image_classification, object_detection, text_classification, image_segmentation
Although you might need to tweak some stuff it provides a good starting point.
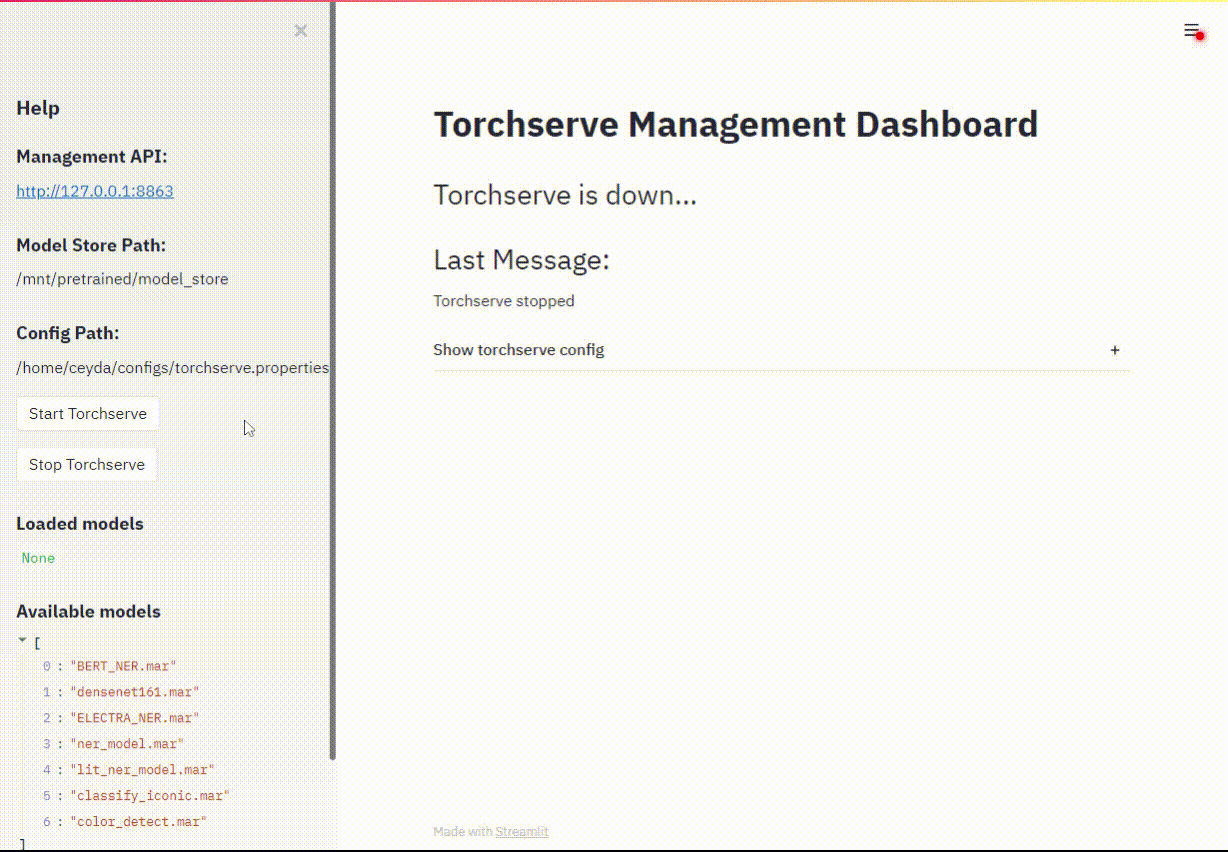
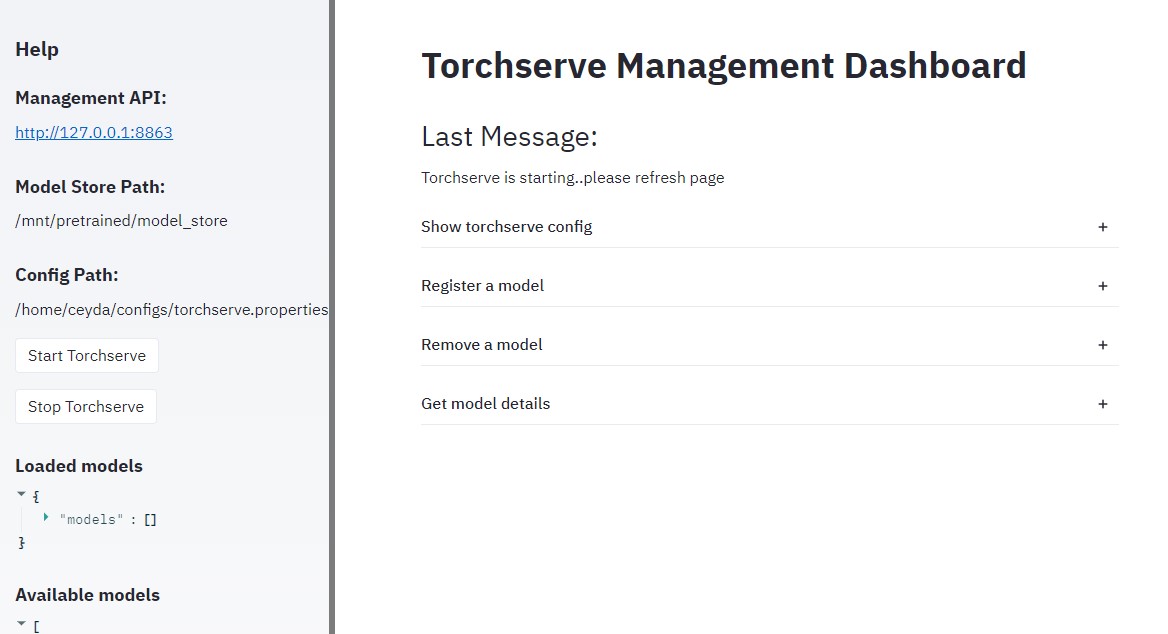
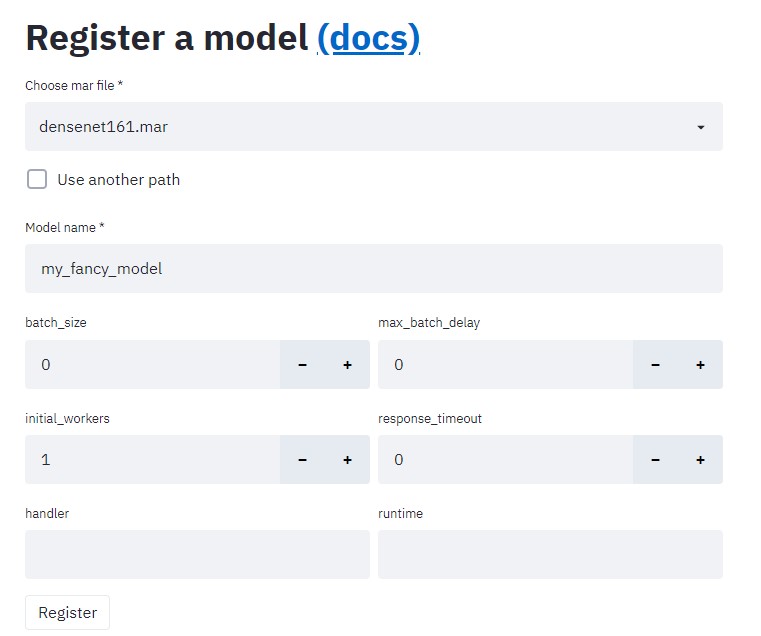
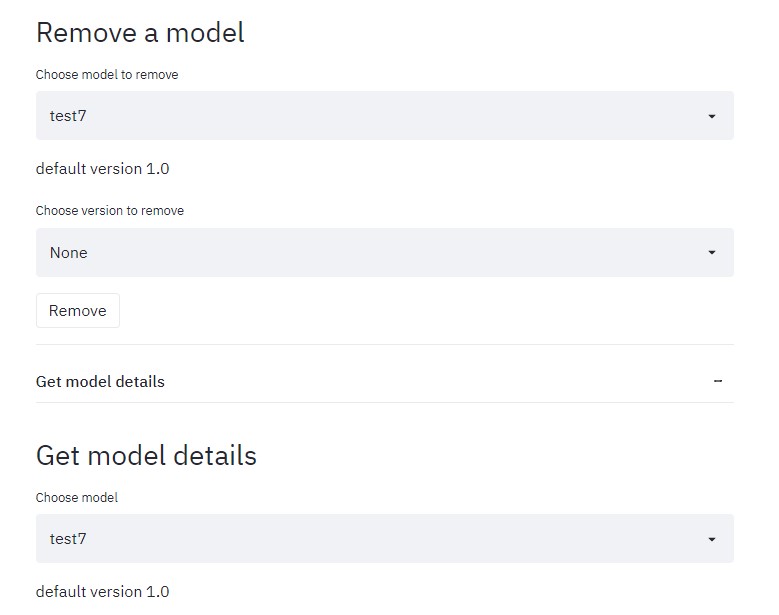
Torchserve uses a REST API for managing models, this dashboard is just a handy UI (clicky-click) way of doing things rather than remembering & typing ..long.. curl commands.
First you need to create a .mar file using torch-model-archiver utility. You can think of this as packaging your model into a stand-alone archive, containing all the necessary files for doing inference. If you already have a .mar file from somewhere you can skip ahead.
Before you run torch-model-archiver you need;
A saved model
A custom or inbuilt handler
How to save a model
There are 2 ways to save your model
With torchscript docs (examples below)* refered to in torchserve docs as script_module (JIT saved models)
# scripted modefrom torchvision import modelsimport torchmodel = models.densenet161(pretrained=True)# OR a model you saved before with torch.save(model, PATH) # model = torch.load('/mnt/model_you_saved_before.pth')sm = torch.jit.script(model)sm.save("my_fancy_model.pt")
I have had more luck with the below method:
Code
#traced modefrom torchvision import modelsimport torchmodel = models.densenet161(pretrained=True)# OR a model you saved before with torch.save(model, PATH) # model = torch.load('/mnt/model_you_saved_before.pth')model.eval()example_input = torch.rand(1, 3, 224, 224)traced_script_module = torch.jit.trace(model, example_input)traced_script_module.save("my_fancy_model.pt")
Package your model
I will explain each option unless it’s self explanatory:
torch-model-archiver\--model-name my_fancy_model \ # this will be the name of the .mar file -> my_fancy_model.mar--version 1.0 \ --handler image_classifier \ # an inbuilt handle (image_classifier,object_detector,text_classifier,image_segmenter)OR a custom handler.py--serialized-file ./my_fancy_model.pt \ # This is required BUT you might not need it depending on your handler (More on this below!-> context.manifest['model']['serializedFile'])--model-file ./model.py \ # You kinda dont need this if you save your model as a whole torch.save(model)or use a torchscript model.(sets context.manifest['model']['modelFile'])--extra-files ./index_to_name.json \ # whatever files you need to make handler work. Inbuild handlers use index_to_name.json to map ids to class labels--runtime python3 \--export-path ./model_store \ # where the .mar file will be created-requirements-file\ # you can package together custom python packages using this.--force\ #overwrite if .mar exists--archive-format default \ # {default,tgz,no-archive}-> outputs .mar or .tar.gz or unarchived(a folder)
Inbuilt handlers
There are default handlers for image_classification, object_detection, text_classification, image_segmentation tasks. These handlers might be enough for you if your model doesn’t vary from the imagenet+resnet standarts. (ie your image preprocessing uses imagenet dimensions and statistics & has at least 5 classes)
In any case it is pretty easy to modify/write your own handler using one of these inbuilt handlers as your base class. Let’s look at the most basic example below the BaseHandler:
class BaseHandler(abc.ABC):# I removed some bits for clarity full code: https://github.com/pytorch/serve/blob/6c56b7ddee00a14fcdfab9bedf37f011e11fdece/ts/torch_handler/base_handler.pydef__init__(self):self.model =Nonedef initialize(self, context):# boilerplate properties = context.system_propertiesself.map_location ="cuda"if torch.cuda.is_available() else"cpu"self.device = torch.device(self.map_location +":"+str(properties.get("gpu_id")) if torch.cuda.is_available() elseself.map_location )self.manifest = context.manifest# model_dir is the inside of your archive!# extra-files are in this dir. model_dir = properties.get("model_dir")# This is where the serialized-file option goes# When writing a custom handler you might even skip it!# (although it will still be a required param of torch-model-archiver, just use placeholder empty file) serialized_file =self.manifest["model"]["serializedFile"] model_pt_path = os.path.join(model_dir, serialized_file)# This is where the model-file opt goes so if not using eager model you can skip it model_file =self.manifest["model"].get("modelFile", "")if model_file: logger.debug("Loading eager model")self.model =self._load_pickled_model(model_dir, model_file, model_pt_path)else: logger.debug("Loading torchscript model")self.model =self._load_torchscript_model(model_pt_path)self.model.to(self.device)self.model.eval()def preprocess(self, data):# data is shaped like [batch_size,...]return datadef inference(self, data, *args, **kwargs):# data is whatever returns from preprocess result =self.model(data)return resultdef postprocess(self, data):""" :return: Python list! This is important """# data is whatever returns from postprocess# return shape should be [batch_size,...]return data.tolist()def handle(self, data, context):self.context = context data =self.preprocess(data) data =self.inference(data) data =self.postprocess(data)return data
What is context? It carries the following properties.
Take a look at some of the inbuilt handlers. Below is some snippets for the image_classifier handler. As you can see below you can just subclass VisionHandler replace with your own image_processing transforms, maybe set a different top_k and you are done!
Code
class VisionHandler(BaseHandler, ABC):""" Base class for all vision handlers """def preprocess(self, data): images = []for row in data: image = row.get("data") or row.get("body") image = Image.open(io.BytesIO(image)) image =self.image_processing(image) images.append(image)return torch.stack(images)class ImageClassifier(VisionHandler):""" ImageClassifier handler class. This handler takes an image and returns the name of object in that image. """ topk =5# These are the standard Imagenet dimensions# and statistics image_processing = transforms.Compose([ transforms.Resize(256), transforms.CenterCrop(224), transforms.ToTensor(), transforms.Normalize(mean=[0.485, 0.456, 0.406], std=[0.229, 0.224, 0.225]) ])def set_max_result_classes(self, topk):self.topk = topkdef get_max_result_classes(self):returnself.topkdef postprocess(self, data): ps = F.softmax(data, dim=1) probs, classes = torch.topk(ps, self.topk, dim=1) probs = probs.tolist() classes = classes.tolist()return map_class_to_label(probs, self.mapping, classes)
If you want more examples, also here is an example handler using transformers pipelines.
Server Configuration
A basic torchserve config is a config.properties file like below.
Change the ports to available ones and create a model_store directory to keep your .mar files. Also modify batch_size and number_of_gpu to your liking.
There are still some ways to go for torchserve to be a full-blown production ready tool IMO. Some features I’m missing; - Native support for type & dimension checks. Sure, you can do all that in your custom handler but would be nice to have it built-in. For example in VisionHandler by adding a check for image dimensions.
Plugins documentation
Torchserve is still pretty new (version 0.2.0 at the time of writing) it will get there!
Notes
Torchserve extracts .mar files in /tmp/ when serving.
index_to_name.json format is {“0”: “cat”,“1”: “dog”}
Security note: Management API/UI should not be on a public address (ie use localhost). I suggest using a reverse proxy with https+auth / or ssh port forwarding also refer to this
Q&A
Questions & Contributions & Comments are welcome~ Open an issue.
Note
Upcoming blog post; speed up your dataloading pipeline with NVIDIA DALI.